Exporting and Importing WordPress Content with XML
What you'll learn
 WordPress content migrationWXR file formatWordPress export/import toolsBest practices for content transfer
When working with open-source platforms like WordPress, the ability to efficiently move content between different installations is a fundamental skill. Whether you're migrating a development site to a production environment, consolidating multiple projects, or simply sharing specific posts and pages, understanding the built-in export and import functionality using XML files is crucial. This article will guide open-source web software developers through the process, demystifying the WordPress eXport/eXchange file (WXR) format and outlining best practices for seamless content migration.
Why Move Content Between WordPress Installations?
There are numerous scenarios where developers need to transfer content. A common use case is the typical development lifecycle where content is created and refined on a local or staging environment and then needs to be pushed to a live production site. This ensures that the live site remains stable while new features or content are being tested.
Another frequent requirement is site migration. When clients decide to move their website to a new hosting provider, or perhaps upgrade their entire server infrastructure, content transfer is a primary step. While full database migrations are often preferred for complete site cloning, content export/import is invaluable when only specific sections or post types need to be moved.
Content syndication and sharing also benefit immensely from this process. A developer managing a network of WordPress sites might need to share a featured article or a specific resource across several installations. Rather than manual re-creation, a simple export and import streamlines this distribution, ensuring consistency and saving valuable development time.
Finally, consolidating multiple smaller sites into a single, larger platform often involves selectively bringing in content. Instead of merging entire databases, which can be complex and error-prone due to differing taxonomies or custom fields, the XML export/import allows for granular control over what content is transferred.
The WordPress Export Tool: Generating WXR Files
WordPress provides a robust, built-in tool for exporting content. Accessing this tool is straightforward: navigate to Tools > Export in your WordPress dashboard. This interface offers granular control over the type of content you wish to export.
Upon entering the export section, you'll be presented with several options:
- All Content: This is the most comprehensive option, exporting all posts, pages, custom post types, comments, custom fields, categories, tags, and navigation menus. It is generally recommended when you want to move the bulk of your site's textual content.
- Posts: Allows you to export specific posts based on author, date range, or category. This is useful for transferring blog content selectively.
- Pages: Similar to posts, you can export pages based on author or date range.
- Custom Post Types: If your site utilizes custom post types (e.g., portfolios, products, testimonials), these will appear as separate export options, allowing you to export them individually.
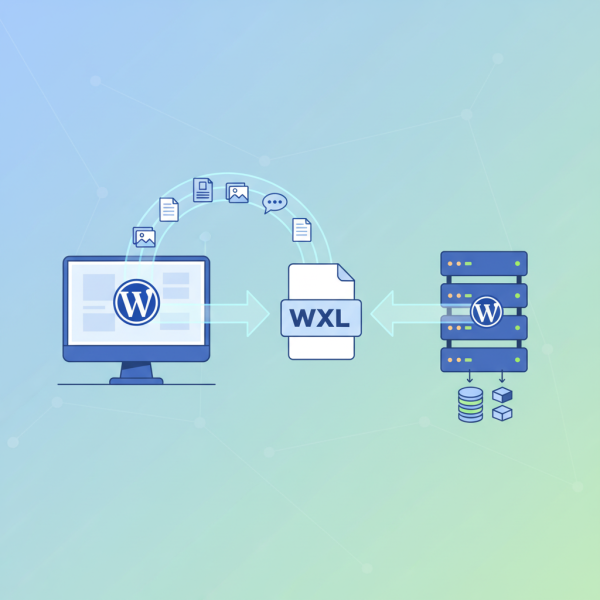
Once you select your desired content and click "Download Export File," WordPress generates an XML file. This file adheres to the WordPress eXport/eXchange (WXR) format. The WXR file is essentially a structured representation of your content, encapsulating post titles, content, excerpts, publication dates, authors, comment data, custom fields, and associated taxonomy terms.
It's important to understand that the WXR file does not contain theme files, plugin files, WordPress core files, server configurations, or even user accounts beyond the author information associated with the exported posts. It's purely a content snapshot, focused on posts, pages, and their associated metadata.
The WordPress Import Tool: Bringing Content In
To bring content into a new or existing WordPress installation, you'll use the corresponding import tool. Go to Tools > Import in your target WordPress dashboard. Unlike the export tool, the importer requires a specific plugin for WordPress content: the "WordPress" importer.
If the WordPress Importer plugin is not already installed, you will see an option to "Install Now" next to the WordPress entry. Click this, then "Activate Plugin & Run Importer." Once activated, you'll be prompted to upload your previously generated WXR XML file.
After uploading the file, the importer will present a critical configuration screen. Here, you have options for author assignment:
- Assign posts to an existing user: You can select an existing user on your target site to attribute all imported content to. This is ideal if you have a single administrator or content editor.
- Create new user with login name: The importer can create new user accounts on the target site based on the original authors from the WXR file.
- Assign posts to an existing user whose login name matches the author in the import file: This option attempts to map original authors to existing users with the same username on the target site.
Crucially, you'll also see a checkbox labeled "Download and import file attachments." Always check this box if you want to bring over images, documents, and other media associated with your posts and pages. Failing to do so will result in broken image links and missing media on the imported content.
Upon clicking "Submit," the import process begins. For large files, this can take some time. Server configurations like max_execution_time and memory_limit can significantly impact the success of large imports. If you encounter timeouts or errors, consider increasing these PHP limits or using command-line tools for larger datasets.
Best Practices for Seamless Content Migration
Successful content migration isn't just about clicking buttons; it requires careful planning and execution:
- Backup Everything: Before initiating any export or import, always create a full backup of both your source and target WordPress installations (database and files). This provides a rollback point if anything goes wrong.
- Clean Up the Source: Before exporting, consider cleaning up your source site. Delete unnecessary revisions, drafts, spam comments, and old unused media. This reduces the size of your XML file and streamlines the import process.
- Understand What's NOT Included: Remember, WXR files do not contain themes, plugins, custom theme options, widget settings, user roles (beyond basic author mapping), or general WordPress settings. These elements must be migrated separately or configured manually on the target site.
- Server Resource Management: For larger sites, increasing PHP's
memory_limitandmax_execution_timeinphp.inior via your hosting control panel can prevent common import failures due to timeouts. Amemory_limitof 256M or 512M andmax_execution_timeof 300 seconds are good starting points. - Test on Staging: Whenever possible, perform a test import on a staging or development environment identical to your production target. This allows you to identify and resolve potential issues without impacting your live site.
- Re-link Internal Links: After importing, internal links within your content might still point to the old domain. Use a search and replace tool (like a database search and replace plugin or WP-CLI's
wp search-replacecommand) to update these URLs. - Media Post-Import: Even with "Download and import file attachments" checked, sometimes media doesn't fully import or re-link correctly, especially if the original site used a CDN or unique media paths. Manually checking media library and content after import is essential.
Advanced Considerations
While the built-in tools are excellent for many scenarios, professional developers often leverage more advanced methods for large-scale or complex migrations. WP-CLI, the command-line interface for WordPress, offers wp export and wp import commands that are more resilient to server timeouts and can be scripted for automated workflows.
For complete site cloning, direct database migration combined with file system transfer is often more efficient. Tools like phpMyAdmin or mysqldump can be used to export and import the entire database. However, this requires careful handling of serialized data and often involves search-and-replace operations on the database itself to update URLs and file paths.
Developers can also hook into the export/import process using WordPress filters and actions to customize the WXR output or modify how content is processed during import, though this is for highly specialized use cases.
Summary
Exporting and importing WordPress content using XML files is a powerful and flexible method for managing content across different installations. We've explored the rationale behind these operations, detailed the use of the WordPress Export tool to generate WXR files, and explained the WordPress Importer for bringing content into a new site. Adhering to best practices such as comprehensive backups, source site cleanup, understanding scope limitations, and managing server resources will ensure a smooth and successful content migration. While the built-in tools suffice for most tasks, developers should be aware of advanced options like WP-CLI for more demanding scenarios, equipping them to handle a wide range of content transfer needs efficiently.
Comprehension questions
 What specific types of content are included in a WordPress WXR XML export file, and what is explicitly excluded?Which WordPress dashboard sections are used for initiating content export and import, respectively, and what additional step is often required for importing?List three critical best practices developers should follow to ensure a smooth and successful content migration process using WXR files.