Precise Module and Content Placement in Joomla
What you'll learn
 Joomla Layout ControlTemplate StructureModule AssignmentContent Positioning
For any Joomla user looking to build or manage a website, understanding module positions is absolutely fundamental. Think of module positions as predefined slots or placeholders within your Joomla template where you can display various pieces of content. These slots dictate exactly where elements like menus, banners, custom text blocks, or login forms will appear on your website. Mastering them empowers you to take full control over your site's layout and design, ensuring that your content is presented precisely where you want it, contributing significantly to both aesthetics and user experience. Without a grasp of module positions, your ability to customize your site's look and feel beyond basic settings will be severely limited, making this a cornerstone of effective Joomla site building.
Understanding Joomla Templates and Module Positions
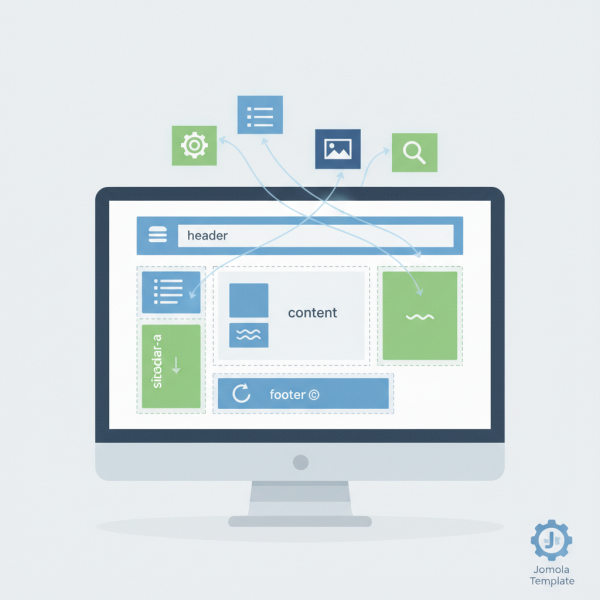
At the heart of every Joomla website's visual presentation is its template. The template defines the overall design, colors, fonts, and crucially, the layout structure. Within this structure, the template developer predefines specific areas known as module positions. These positions are essentially named regions, such as "position-1", "sidebar-a", "header", or "footer", where different types of modules can be published.
It's important to recognize that not all templates are created equal. Each template will offer a unique set of module positions, often with different naming conventions and visual arrangements. A template designed for a blog might have strong sidebar positions, while a business template might emphasize header and footer areas. Familiarizing yourself with your chosen template's specific positions is the first step towards effective content placement.
Identifying Available Module Positions
Before you can place content, you need to know where you can place it. Joomla provides a straightforward way to visualize your template's module positions on the frontend of your website. This invaluable feature is a game-changer for layout planning.
To enable the Module Position Preview:
- Navigate to "Extensions" > "Templates" > "Templates" in your Joomla administrator panel.
- Select the "Options" button in the toolbar.
- Ensure the "Preview Module Positions" setting is set to "Enabled".
Once enabled, you can then view your site on the frontend and add ?tp=1 to the end of your website's URL (e.g., www.yourwebsite.com/?tp=1). This will overlay your website with the names and outlines of all available module positions, making it incredibly easy to see where each slot is located visually. This visual aid is crucial for planning your layout and understanding how different modules will fit together.
Alternatively, for the technically inclined, the template's templateDetails.xml file (found in the template's root directory via FTP or your host's file manager) lists all defined module positions. While not as visual, it provides a comprehensive, definitive list.
Creating and Assigning Modules
Modules are the building blocks of dynamic content in Joomla. They are small, self-contained applications that provide specific functionality, such as displaying the main menu, showing recent articles, offering a search box, or simply displaying custom HTML content. Once you've identified your desired module position, the next step is to create or configure a module and assign it to that position.
The process generally involves these steps:
- From your Joomla administrator panel, go to "Extensions" > "Modules".
- Click the "New" button to create a new module, then choose the type of module you wish to create (e.g., "Custom" for free text and images, "Menu" for navigation, "Articles - Latest" for recent blog posts).
- Configure the module's specific settings, such as title, content, and display options.
- Crucially, select the desired "Position" from the dropdown menu. This is where you connect your module to one of the available slots defined by your template.
- Finally, under the "Menu Assignment" tab, determine on which menu items (pages) this module should appear. You can choose to show it on "All Pages", "No Pages", or "Only on the pages selected". This granular control allows for highly specific content display across your site.
- Ensure the "Status" is set to "Published" and then "Save & Close".
Your module should now appear on your website in the selected position and on the chosen pages.
Advanced Module Placement Techniques
Beyond basic assignment, several techniques allow for even greater precision and flexibility in module placement and appearance.
One such technique is ordering. If you assign multiple modules to the same position, Joomla allows you to define their display order. In the "Extensions" > "Modules" screen, you can sort by position and then drag and drop modules to reorder them, dictating which appears first, second, and so on, within that specific slot. This is vital for presenting content logically.
Another powerful feature is the use of module suffixes. Many templates offer CSS classes that can be applied to modules to change their styling, such as adding a border, changing background color, or adjusting padding. These suffixes are entered in the "Advanced" tab of a module's settings, under "Module Class Suffix". Refer to your template's documentation for available suffixes.
Consider responsive design. Module positions often behave differently on mobile devices. What looks good in a sidebar on a desktop might stack awkwardly on a smartphone. Always test your module placements across various screen sizes to ensure a consistent and user-friendly experience.
Troubleshooting Joomla Module Placement
Even with careful planning, you might encounter situations where a module isn't appearing as expected. Here are some common troubleshooting tips:
- Check Status: Ensure the module's "Status" is set to "Published". An unpublished module will never appear.
- Verify Position: Double-check that you've assigned the module to the correct position. It's easy to select the wrong one from a long dropdown list.
- Review Menu Assignment: This is a frequent culprit. Confirm that the module is assigned to display on the specific page(s) you are currently viewing. If it's set to "No Pages" or "Only on the pages selected" and the current page isn't chosen, it won't show.
- Access Levels: Ensure the module's "Access" level (e.g., Public, Registered, Special) matches the access level of the user viewing the page. If a module is set to "Registered" and you are not logged in, you won't see it.
- Template Overrides: Occasionally, a template override might inadvertently hide a module position or change its rendering. While less common for beginners, it's worth noting.
Systematically checking these settings will usually resolve most module display issues.
Summary
Module positions are the structural backbone of content presentation in Joomla. By understanding how templates define these positions, how to visually identify them, and the steps involved in creating and assigning modules to them, you gain unparalleled control over your website's layout. Whether you're aligning menus, showcasing recent articles, or integrating custom content, mastering module positions is an essential skill for any Joomla user. This knowledge allows for precise content placement, leading to a more organized, aesthetically pleasing, and ultimately more effective website for your audience.
Comprehension questions
 What is the primary function of module positions in Joomla?How can a Joomla user identify the available module positions within their chosen template?Besides assigning a position, what other crucial setting determines where a module appears on the frontend?What are two common reasons why a module might not be appearing on a Joomla website as expected?