The Beginner’s Guide to Switching Joomla Templates
What you'll learn
 Joomla Template BasicsTemplate Installation StepsConfiguration and AssignmentSite Backup Importance
Embarking on a journey to refresh your Joomla website's appearance can seem daunting, especially for beginners concerned about safeguarding their valuable content. Fortunately, Joomla's robust templating system is designed to allow significant aesthetic changes without jeopardizing your site's core information. This guide will walk you through the essential steps and best practices for switching your Joomla template, ensuring a smooth transition that updates your site's design while keeping all your articles, images, and data perfectly intact. We'll cover everything from crucial preliminary steps to successful installation and post-migration checks, empowering you to confidently transform your Joomla site's look.
Understanding Joomla Templates
In the world of Joomla, a template is much more than just a skin; it's the framework that controls the overall look, feel, and layout of your website. It dictates everything from color schemes and font choices to the arrangement of your content and modules. Essentially, the template defines how your content is presented to your visitors. It consists of various files, including CSS stylesheets for styling, HTML for structure, PHP files for dynamic content generation, and JavaScript for interactive elements.
Joomla sites typically utilize two types of templates: the front-end template, which is what your visitors see, and the back-end template, which is used for the administration interface. When we talk about switching designs, we are primarily referring to the front-end template that shapes the user experience.
Why Change Your Template?
There are numerous compelling reasons why a Joomla user might decide to change their website's template:
- Modernization: An outdated design can make your site appear less credible or professional. A new template can instantly bring a fresh, contemporary look.
- Responsiveness: With the majority of internet traffic now coming from mobile devices, a responsive template that adapts gracefully to different screen sizes is no longer a luxury but a necessity. Many older templates may not be fully responsive.
- Rebranding: A change in your organization's branding or mission might necessitate a complete visual overhaul to align with your new identity.
- New Features and Functionality: Newer templates often come packed with advanced features, improved SEO capabilities, accessibility enhancements, and better integration with popular extensions.
- Performance Improvement: Well-coded, lightweight templates can significantly improve your site's loading speed, enhancing user experience and SEO rankings.
Before You Begin: Essential Preparations
Preparation is key to a successful template switch. Skipping these vital steps can lead to headaches and potential data loss. Think of this as your safety net.
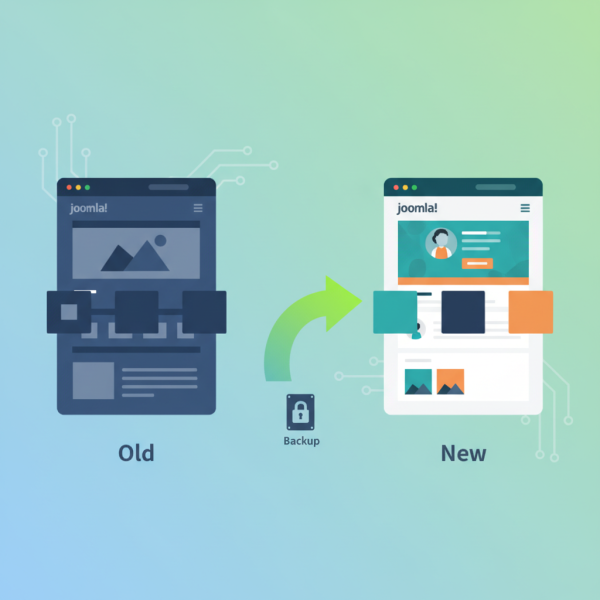
- Backup Your Entire Website: This is arguably the most critical step. Before making any significant changes, create a complete backup of your Joomla installation, including both your files and your database. Tools like Akeeba Backup make this process straightforward. A full backup ensures that if anything goes wrong, you can quickly restore your site to its previous working state without losing any content or configuration.
- Check Template Compatibility: Ensure that your chosen new template is fully compatible with your current version of Joomla. Using an incompatible template can lead to display issues, broken functionalities, or even prevent your site from loading correctly. Most reputable template providers clearly state the Joomla versions their templates support.
- Review Existing Customizations: If you've made direct modifications to your current template's core files (CSS, PHP, etc.), be aware that these changes will not carry over to the new template. Document these customizations so you can reapply them to the new template or find alternative solutions, perhaps using Joomla's override system or custom CSS capabilities.
- Choose a Reputable Template: Invest time in selecting a well-supported template from a trusted developer. Look for templates with good documentation, regular updates, and active support forums. Both free and paid options are available, with paid templates often offering more features and dedicated support.
Installing a New Template
Once you've completed your preparations and selected your new template, the installation process is typically straightforward using Joomla's built-in extension manager.
- Download the Template Package: Obtain the template package from the developer's website. This will usually be a compressed .zip file. Do not unzip it before uploading.
- Log in to Your Joomla Administrator Panel: Access the back-end of your Joomla website.
- Navigate to the Extension Manager: Go to
Extensions > Manage > Install. - Upload and Install: You'll see several options for installation. The most common method is to use the "Upload Package File" tab. Click "Browse for file," select your downloaded .zip template package, and then click "Upload & Install." Joomla will process the package and display a success message if the installation is completed without issues.
Some templates might come with sample data or additional plugins/modules. Carefully read the template's documentation to understand if these are necessary for your specific needs and how to install them, often following similar steps through the Extension Manager.
Assigning and Configuring Your Template
After installation, the template needs to be activated and potentially configured to suit your site's specific layout and content.
- Access Template Styles: Go to
Extensions > Templates > Styles. Here you will see a list of all installed template styles. Your newly installed template should appear here. - Set as Default (Global): To make your new template the default for your entire site, find its entry in the list, check the box next to it, and then click the "Default" button in the toolbar. The star icon next to the template style will indicate that it is now the default.
- Assign to Specific Menu Items: Joomla offers powerful flexibility by allowing you to assign different templates to different menu items. This means you can have one template for your main site and another for a specific section (e.g., a blog or portfolio). To do this, edit the template style (click on its name), go to the "Menu Assignment" tab, and select the menu items where you want this template to be active.
- Configure Template Parameters: Many templates come with extensive configuration options accessible by clicking on the template style name. These parameters allow you to customize colors, fonts, logo, social media links, layout options, and more, all without touching any code. Explore these settings thoroughly to tailor the template to your brand.
- Adjust Module Positions: Different templates have different module positions (areas where modules can be displayed). You will need to review your existing modules (
System > Site Modules) and adjust their assigned positions to match the new template's available positions. Pay close attention to how your content flows with the new layout.
Post-Installation Checklist
Once your new template is active, it's crucial to perform a thorough check to ensure everything is working as expected and your content is displayed correctly.
- Clear Your Site's Cache: Go to
System > Clear Cacheand clear all cache entries. Also, clear your browser's cache. This ensures you are viewing the most current version of your site. - Test All Pages and Functionalities: Navigate through every page of your website. Check articles, contact forms, galleries, e-commerce sections, and any custom components or extensions you use. Ensure all links work, images display, and forms submit correctly.
- Cross-Browser and Device Testing: View your website on different web browsers (Chrome, Firefox, Safari, Edge) and various devices (desktop, tablet, smartphone) to confirm its responsiveness and consistent appearance.
- Review SEO Implications: While content remains, the new template might affect page structure or loading speed, which can impact SEO. Monitor your site's performance using tools like Google Search Console.
Troubleshooting Common Issues
Even with careful planning, you might encounter minor issues. Here are a few common problems and their solutions:
- Broken Layout or Missing Styles: This often indicates a caching issue or an incompatibility. Clear all caches (Joomla and browser) first. If the problem persists, double-check template compatibility with your Joomla version.
- Content Overlapping or Misaligned: This usually points to module position conflicts. Go to
System > Site Modulesand ensure all modules are assigned to appropriate positions supported by your new template. You might need to disable some modules temporarily to identify the culprit. - Images or Media Not Displaying: Verify that your media files are still in their correct directories and that the file paths haven't been inadvertently affected. Re-check the template's settings, as some templates have specific requirements for image dimensions or display methods.
Summary
Switching your Joomla website's template is a powerful way to refresh its appearance and enhance user experience without ever needing to touch your valuable content. By meticulously following a structured approach that includes comprehensive backups, careful template selection, precise installation, and thorough post-implementation testing, even beginners can achieve a seamless design transition. Remember that your content is stored independently in the database, making the template a flexible skin that can be swapped as needed. Embrace the flexibility of Joomla templates to keep your website looking modern, professional, and engaging for your audience.
Comprehension questions
 Why is creating a full backup of your Joomla site considered the most critical step before switching templates?What are the two main types of templates in Joomla, and which one is primarily affected when switching designs?Besides setting a template as default, how else can you assign a template to specific parts of your Joomla site?List three common post-installation checks that should be performed after activating a new Joomla template.