Joomla Installation and Initial Configuration
- -->> 2. Joomla Installation and Initial Configuration
What you'll learn
 Joomla Installation PrerequisitesJoomla Wizard NavigationPost-Installation Security & ConfigurationJoomla Development Environment Setup
Joomla is a powerful, open-source Content Management System (CMS) that allows users to build dynamic websites and online applications. Mastering its installation and initial configuration is a fundamental step for anyone looking to leverage its capabilities for web development. This article will guide you through the complete process of setting up Joomla on a web server, configuring essential settings, and preparing your environment for efficient development.
Essential Prerequisites for Joomla
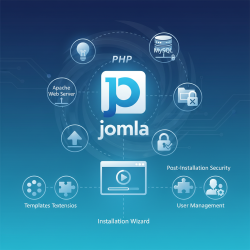
Before embarking on the Joomla installation journey, ensure your web server environment meets the necessary requirements. A typical setup includes a web server, a database, and PHP. Most shared hosting providers offer a LAMP (Linux, Apache, MySQL, PHP) or WAMP (Windows, Apache, MySQL, PHP) stack, which is ideal.
Key prerequisites include:
- Web Server: Apache, Nginx, or Microsoft IIS. Apache is the most common and widely supported.
- PHP: Joomla requires a specific PHP version range. Always check the official Joomla documentation for the latest compatible versions. Ensure necessary PHP extensions like cURL, OpenSSL, GD, and MySQLi are enabled.
- Database: MySQL, PostgreSQL, or SQL Server. MySQL is the most prevalent choice. You will need a database name, username, and password.
- FTP Client: For uploading Joomla files to your server (e.g., FileZilla).
- Text Editor: For minor configuration file edits (e.g., VS Code, Notepad++).
Downloading Joomla and Uploading Files
The first practical step is to acquire the Joomla installation package. Visit the official Joomla website and download the latest stable version. This will typically be a compressed file (e.g., .zip or .tar.gz).
Once downloaded, extract the contents of the archive to a folder on your local computer. This folder will contain all the core Joomla files.
Next, connect to your web server using an FTP client. Navigate to the desired directory where your website will reside. For instance, this might be public_html, htdocs, or a subdomain folder. Upload all the extracted Joomla files and folders from your local machine to this directory on the server. Ensure all files are uploaded correctly and retain their original directory structure. This process can take some time depending on your internet connection and the number of files.
Navigating the Joomla Installation Wizard
With the files uploaded, open your web browser and navigate to the URL of your website (e.g., http://yourdomain.com). The Joomla installation wizard should automatically launch.
The wizard will guide you through several steps:
- Main Configuration: Set your site name, admin email, administrator username, and password. This is crucial for logging into your site's backend later.
- Database Configuration: Input the database type (MySQLi is common), hostname (usually
localhost), username, password, and the database name you created earlier. You can also specify a table prefix, which is good practice for security and if you plan to run multiple Joomla installations in one database. - Finalization: Review your settings. Here, you have an option to install sample data. For new users, installing some sample data can be beneficial for understanding Joomla's structure. For experienced users building from scratch, you might skip this.
After confirming, the installation process will begin, populating your database and configuring the site.
Post-Installation Essential Configuration
Upon successful installation, you will be prompted to remove the installation folder. This is a critical security step. Do not skip this. Removing this folder prevents unauthorized re-installation or access to the installation wizard.
Next, access your Joomla administrator backend by navigating to http://yourdomain.com/administrator. Log in with the username and password you created during the wizard.
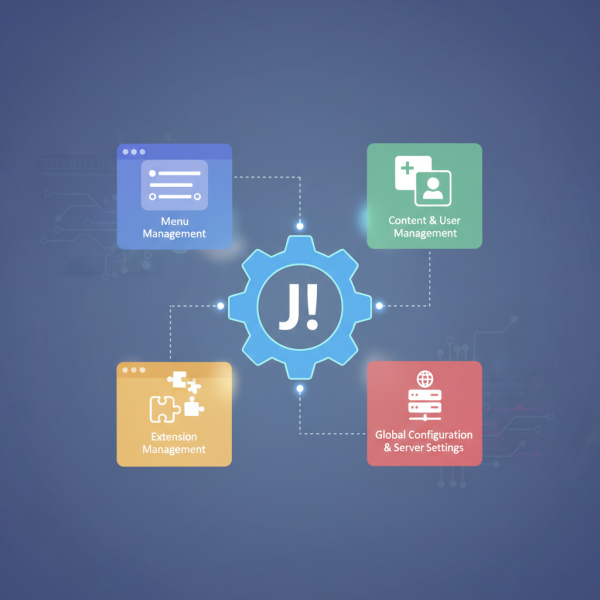
From the backend, go to System > Global Configuration. Here, you can fine-tune various site-wide settings:
- Site Tab: Adjust the site name, enable or disable the site offline feature, and set the default editor.
- SEO Settings Tab: Enable Search Engine Friendly URLs and URL Rewriting. For URL Rewriting to work, you often need to rename
htaccess.txtto.htaccess(if using Apache) and ensure your server supportsmod_rewrite. - Server Tab: Configure FTP settings, database settings, and error reporting.
- System Tab: Manage debugging options, cache settings, and session settings.
Review all tabs and adjust settings according to your project's needs.
Preparing Your Environment for Development
Once Joomla is installed and essential settings are configured, you can start preparing your environment for active development. This involves a few key areas to enhance usability and functionality.
- Templates: Joomla comes with default templates. To change the look and feel, you can install new templates from the Extensions menu. Navigate to
Extensions>Manage>Installand upload your chosen template package. Once installed, activate it underExtensions>Templates>Styles. - Extensions: Joomla's power lies in its extensibility. Components, modules, and plugins can add significant features. Explore the Joomla Extensions Directory (JED) for thousands of free and commercial extensions. Installation follows a similar process to templates.
- User Management: Go to
Users>Manageto create new users, assign them to different groups (e.g., author, editor, publisher), and define their permissions. This is crucial for collaborative development or managing content contributors. - Content Creation: Start creating categories and articles via
Content>ArticlesandContent>Categories. Understanding how to structure your content is vital for a well-organized site.
Summary
This article guided you through the comprehensive process of installing Joomla on a web server, starting from meeting the essential prerequisites such as a web server, PHP, and a database, to downloading and uploading the core files. We then walked through the intuitive Joomla installation wizard, covering critical steps like database configuration and administrator setup. Post-installation, we emphasized the importance of removing the installation folder for security and delved into configuring global settings like SEO-friendly URLs. Finally, we touched upon preparing the environment for development by managing templates, extensions, and user roles, setting the stage for building a robust and functional website with Joomla.
Comprehension questions
 What are the three core prerequisites for installing Joomla on a web server?What critical security step must be performed immediately after a successful Joomla installation?Which file needs to be renamed for Search Engine Friendly URLs to work correctly with Apache servers?Name three types of extensions that can be installed in Joomla to add significant features to a website.
Community Poll
Next Lesson
Course Contents : Joomla Website QuickStart Guide
- >> 2.
 Joomla Installation and Initial Configuration