Installation, Dashboard Navigation, and Essential Configuration
- -->> 3. Installation, Dashboard Navigation, and Essential Configuration
What you'll learn
 WordPress InstallationDashboard NavigationEssential Settings ConfigurationWebsite Preparation
WordPress' robust capabilities and user-friendly interface make it an ideal choice for everyone from individual bloggers to large businesses. However, unlocking its full potential starts with a proper installation, understanding its intuitive dashboard, and configuring the essential settings that lay the groundwork for a successful online presence. This guide will walk you through these crucial initial steps, ensuring your WordPress site is not just up and running, but optimized and ready for your unique content.
Setting Up Your WordPress Environment
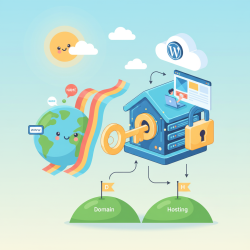
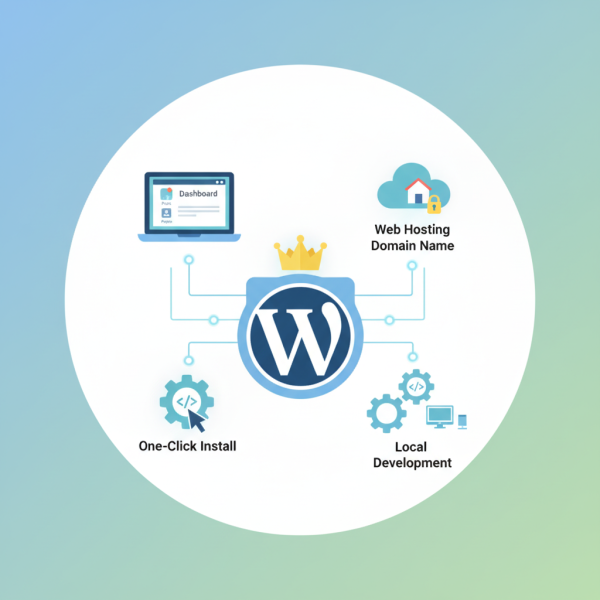
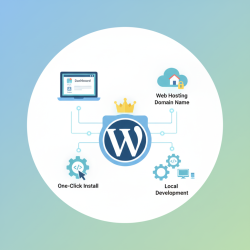
Before installing WordPress, you'll need two fundamental components: a domain name and web hosting. The domain name is your website's address (e.g., example.com), and web hosting provides the server space where your website's files will reside. Once you have these in place, you are ready to proceed with the installation.
WordPress Installation Methods
There are generally three primary ways to install WordPress, catering to different levels of technical expertise:
- One-Click Installers (Softaculous/Fantastico): Most hosting providers offer automated installers like Softaculous. This is by far the simplest method. You typically log into your hosting control panel (cPanel), find the WordPress icon, click it, fill out a few basic details (site title, admin username, password, email), and the installer handles the database creation and file uploads automatically. Your WordPress site will be ready in minutes.
- Manual Installation: This method involves downloading the WordPress core files from WordPress.org, creating a database and database user via your hosting control panel's MySQL Databases section, uploading the WordPress files to your server (usually via FTP or cPanel's File Manager), and then running the famous "5-minute installation" wizard by navigating to your domain in a web browser. While slightly more involved, it gives you a deeper understanding of the process.
- Localhost Installation: For development and testing purposes, you can install WordPress on your personal computer using tools like XAMPP or MAMP. This creates a local server environment, allowing you to build and experiment with your site offline before deploying it to a live web host. This is excellent for learning and theme/plugin development without affecting a live site.
For beginners, the one-click installer is highly recommended due to its simplicity and speed. Always ensure you note down your chosen admin username and password during this step, as they are crucial for accessing your site's backend.
Navigating the WordPress Dashboard
Once WordPress is installed, you'll access your administrative area, commonly known as the dashboard, by appending "/wp-admin" to your domain name (e.g., yourdomain.com/wp-admin). The dashboard is the control center for your entire website, offering a comprehensive suite of tools for managing content, appearance, plugins, users, and settings.
Dashboard Overview
Upon logging in, you'll be greeted by the main dashboard screen. This area provides quick glances at site activity, recent drafts, WordPress news, and other widgets. The real power, however, lies in the left-hand navigation menu:
- Posts: This is where you create, edit, and manage all your blog posts. You can also organize them with categories and tags.
- Media: Upload, manage, and organize all your images, videos, audio files, and documents that you use on your site.
- Pages: Create static content like "About Us," "Contact Us," or "Privacy Policy" pages. Unlike posts, pages are not typically time-sensitive.
- Comments: Moderate comments left by visitors on your posts and pages.
- Appearance: This critical section allows you to manage themes, customize your site's look, create menus, and add widgets to sidebars and footers.
- Plugins: Extend the functionality of your WordPress site by installing and managing plugins. There are tens of thousands of plugins available for almost any feature you can imagine.
- Users: Manage user accounts, roles, and permissions for anyone who has access to your WordPress backend.
- Tools: Provides utility functions like importing/exporting content, checking site health, and managing personal data.
- Settings: This section is where you configure the core functionalities of your WordPress site, which we will delve into next.
Familiarizing yourself with each of these sections is key to effectively managing your website. Spend some time clicking through them to understand their purpose.
Configuring Essential WordPress Settings
Before you start adding content, it's vital to configure some foundational settings. These settings influence your site's behavior, appearance, and how search engines perceive it.
General Settings
Navigate to Settings > General. Here you can:
- Site Title and Tagline: These are crucial for branding and SEO. The site title often appears in browser tabs and search results. The tagline is a short, descriptive phrase.
- WordPress Address (URL) and Site Address (URL): For most users, these should be the same and match your domain. Do not change these unless you are intentionally moving your site or configuring an SSL certificate.
- Administration Email Address: Ensure this is an active email address as WordPress will send important notifications here.
- Membership: Decide if users can register on your site. If so, set their default role.
- Timezone, Date Format, and Time Format: Configure these to match your geographical location and preference.
Writing Settings
Under Settings > Writing, you'll find options related to how you compose and publish content. Key settings include the default post category and default post format. You can also configure a "Post via email" option, though this is less commonly used today.
Reading Settings
This is a highly important section (Settings > Reading) for defining your site's front page. You can choose to display:
- Your latest posts: Ideal for blogs, where the newest content is always at the top.
- A static page: Perfect for business websites or portfolios that want a specific landing page as their homepage. You'll need to create two pages first: one for your homepage and one for your blog posts.
Crucially, there's a checkbox here: "Discourage search engines from indexing this site." Ensure this box is unchecked unless you are developing your site and do not want it to appear in search results yet. Leaving it checked on a live site will prevent search engines like Google from finding and listing your content.
Discussion Settings
In Settings > Discussion, you manage how comments work on your site. You can enable or disable comments, set moderation rules (e.g., require manual approval for comments), and configure notification emails. These settings help maintain a healthy and spam-free comment section.
Media Settings
Settings > Media allows you to define the default sizes for image thumbnails, medium, and large images when they are uploaded to your media library. It also offers an option to organize your uploads into month- and year-based folders, which is generally a good practice for keeping your media library organized.
Permalinks
The Settings > Permalinks section is critically important for both user experience and search engine optimization (SEO). Permalinks are the permanent URLs to your individual posts, pages, categories, and other content. A well-structured permalink is readable and includes keywords, making it easier for users to understand and search engines to index their content.
While several options are available, the "Post name" option (e.g., yourdomain.com/sample-post/) is almost universally recommended. It creates clean, descriptive URLs. Change this setting early in your site's life, as changing it later can break existing links and affect your SEO. After selecting "Post name," always click "Save Changes."
Privacy Settings
WordPress includes built-in tools for managing your site's privacy policy. Under Settings > Privacy, you can select an existing page to be your privacy policy or create a new one. This is essential for legal compliance, especially with regulations like GDPR.
Summary
Mastering WordPress from the ground up involves a clear understanding of its installation process, an ability to navigate its comprehensive dashboard, and the discipline to configure its essential settings correctly. We covered the three main installation methods, from the simplicity of one-click installers to the control of manual setup, and even local development. We then explored the WordPress dashboard, detailing the purpose of key menu items like Posts, Pages, Appearance, and Plugins, which serve as your command center. Finally, we meticulously walked through crucial settings in the General, Reading, Writing, Discussion, Media, Permalinks, and Privacy sections, emphasizing how each configuration prepares your website for optimal performance, user experience, and search engine visibility. By following these steps, you establish a solid and scalable foundation for your online presence.
Comprehension questions
 What are the three common methods for installing WordPress discussed in the article?Name at least three key sections or menu items found in the WordPress dashboard.Which essential setting primarily affects how your blog posts and pages are indexed and shared?What is the purpose of configuring permalinks, and what is the recommended setting?
Community Poll
Next Lesson
Course Contents : Starting a New Website in WordPress
- >> 3.
 Installation, Dashboard Navigation, and Essential Configuration