- -->> 3. Manually Building with WAMP, MAMP, and LAMP
What you'll learn
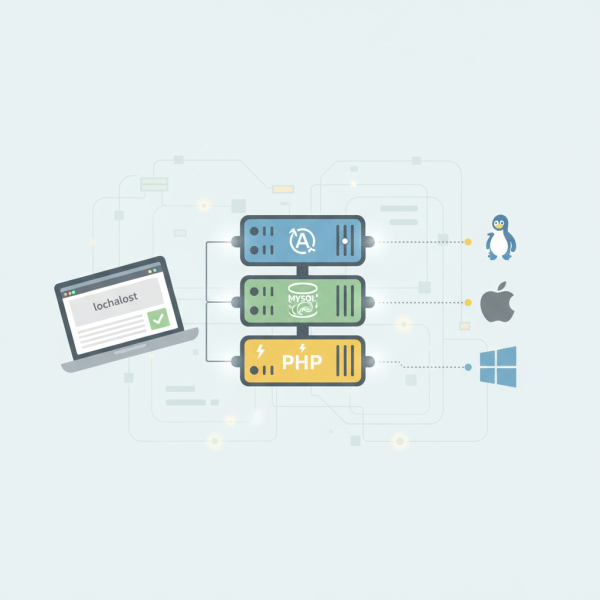
 Apache Server ConfigurationMySQL/MariaDB Database SetupPHP Environment InstallationCross-Platform Local Development
Setting up a local development environment is a fundamental step for any web developer. While pre-packaged solutions like XAMPP, Laragon, or Docker provide convenience, understanding how to manually install and configure each component of a WAMP (Windows, Apache, MySQL, PHP), MAMP (macOS, Apache, MySQL, PHP), or LAMP (Linux, Apache, MySQL, PHP) stack offers unparalleled control, deeper insight into system operations, and the flexibility to customize your environment precisely to your project's needs. This guide will walk you through the manual installation process for each of these traditional local server stacks on their respective operating systems, empowering you with the knowledge to build a robust and tailored development environment from the ground up.
Understanding the Core Components
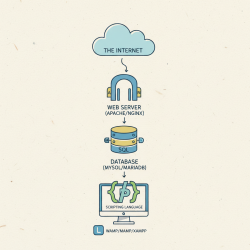
Before diving into the installation specifics, it's crucial to grasp the role of each component within the WAMP/MAMP/LAMP stack:
- Apache HTTP Server: This is the web server software responsible for serving your web pages. When a browser requests a page, Apache processes the request and sends back the appropriate files.
- MySQL/MariaDB: These are relational database management systems (RDBMS) used to store and manage your application's data. Most modern web applications rely on a database to store user information, content, and other dynamic data.
- PHP (Hypertext Preprocessor): A widely-used server-side scripting language designed for web development. It allows you to create dynamic and interactive websites by processing code on the server before sending the resulting HTML to the client's browser.
Manual LAMP Setup (Linux)
Setting up LAMP on a Linux distribution (like Ubuntu or Debian) typically involves using the package manager.
1. Apache Installation
Open your terminal and execute the following commands:
sudo apt update
sudo apt install apache2
After installation, Apache should start automatically. You can verify this by navigating to http://localhost in your web browser, which should display the Apache default welcome page. To manage Apache, use sudo systemctl start apache2, sudo systemctl stop apache2, or sudo systemctl restart apache2.
2. MySQL/MariaDB Installation
MariaDB is a popular drop-in replacement for MySQL. Choose one for installation.
For MariaDB:
sudo apt install mariadb-server
For MySQL:
sudo apt install mysql-server
After installation, run the security script to enhance security:
sudo mysql_secure_installation
Follow the prompts to set a root password, remove anonymous users, disallow remote root login, and remove the test database.
3. PHP Installation
Install PHP and the necessary modules for Apache and MySQL:
sudo apt install php libapache2-mod-php php-mysql
To enable PHP to process files, ensure that index.php is listed as a directory index. Edit /etc/apache2/mods-enabled/dir.conf and move index.php to the beginning of the DirectoryIndex list. Save and restart Apache: sudo systemctl restart apache2.
4. Testing the LAMP Stack
Create a test PHP file (e.g., info.php) in your web root directory (/var/www/html/):
sudo nano /var/www/html/info.php
Add the following content:
Save and exit. Navigate to http://localhost/info.php in your browser. If you see the PHP information page, your LAMP stack is working correctly. Remember to remove this file from a production environment.
Manual WAMP Setup (Windows)
Setting up WAMP manually on Windows requires downloading and configuring each component individually.
1. Apache Installation
Download the Apache HTTP Server binaries from an unofficial but reliable source like ApacheLounge (as official binaries are not directly provided for Windows by Apache). Extract the downloaded zip file (e.g., to C:Apache24). Edit C:Apache24confhttpd.conf:
- Change
Define SRVROOT "/Apache24"to your installation path. - Uncomment
LoadModule rewrite_module modules/mod_rewrite.soif needed. - Ensure
Listen 80is correct.
Install Apache as a service:
Open CMD as administrator and run C:Apache24binhttpd.exe -k install. Then start it with net start Apache2.4.
2. MySQL Installation
Download the MySQL Community Server MSI installer from the official MySQL website. Choose the "Standalone" option if you want to avoid the MySQL Installer. During installation, choose a "Server Only" setup and configure a root password. Note the installation path (e.g., C:Program FilesMySQLMySQL Server 8.0). The installer usually sets up MySQL as a service.
3. PHP Installation
Download the appropriate non-thread-safe (NTS) PHP zip package for Windows from windows.php.net. Extract it (e.g., to C:php). Rename php.ini-development to php.ini in the PHP directory. Edit php.ini:
- Uncomment
extension_dir = "ext". - Uncomment and configure necessary extensions (e.g.,
extension=mysqli,extension=gd). - Set
date.timezoneto your local timezone.
Configure Apache to use PHP by adding these lines to httpd.conf (adjust paths):
LoadModule php_module "C:/php/php8apache2_4.dll"
AddHandler application/x-httpd-php .php
PHPIniDir "C:/php"
Restart Apache service: net stop Apache2.4 then net start Apache2.4.
4. Testing the WAMP Stack
Create an info.php file in your Apache web root (usually C:Apache24htdocs) with. Access http://localhost/info.php in your browser.
Manual MAMP Setup (macOS)
macOS comes with Apache and PHP pre-installed, though they might not be the latest versions. MySQL/MariaDB need to be installed separately, often via Homebrew.
1. Apache Configuration (macOS)
Apache is often pre-installed. Start it with: sudo apachectl start. The web root is usually /Library/WebServer/Documents. Edit /etc/apache2/httpd.conf to enable virtual hosts, rewrite module, and PHP module (uncomment lines).
2. PHP Configuration (macOS)
macOS includes PHP, but it might be an older version. You can install a newer version via Homebrew: brew install php. After installation, you'll need to link the Homebrew PHP with Apache. This typically involves modifying /etc/apache2/httpd.conf to load the Homebrew PHP module and ensuring the correct PHPIniDir directive is set.
3. MySQL Installation (macOS)
Install MySQL or MariaDB using Homebrew:
brew install mysql (or mariadb)
Start the service: brew services start mysql. Run the security script: mysql_secure_installation.
4. Testing the MAMP Stack
Create an info.php in your web root (/Library/WebServer/Documents) with. Navigate to http://localhost/info.php in your browser.
Post-Installation and Best Practices
Once your stack is running, consider these points:
- Virtual Hosts: Configure virtual hosts in Apache to host multiple websites on your local machine using distinct domain names (e.g.,
myproject.local). This involves editing Apache'shttpd-vhosts.confand your system'shostsfile. - Permissions: Ensure your web server has the correct read/write permissions for your project files, but avoid overly permissive settings (like 777) for security reasons.
- Security: Always secure your database with a strong root password and create specific users for your applications with limited privileges.
- Troubleshooting: Check Apache error logs (
error_log), PHP error logs, and MySQL error logs for issues. - Updates: Regularly update your components to benefit from new features and security patches.
Summary
Manually setting up WAMP, MAMP, or LAMP provides an invaluable learning experience and allows for a highly customized development environment. This article guided you through the step-by-step process of installing and configuring Apache, MySQL/MariaDB, and PHP on Windows, macOS, and Linux, respectively. We covered initial component installation, essential configuration adjustments for each operating system, and basic testing procedures. By mastering this manual setup, developers gain a deeper understanding of their local server architecture and the flexibility to tailor it precisely to their specific project requirements, moving beyond the limitations of pre-packaged solutions and fostering a more robust development workflow.
Comprehension questions
 What are the three core components that make up a WAMP, MAMP, or LAMP stack, and what role does each play?Briefly describe the key steps involved in installing Apache, MySQL/MariaDB, and PHP when setting up a LAMP stack on a Linux distribution.When manually configuring Apache for PHP on Windows, which two configuration files are primarily modified, and what essential directives are typically added?What are two important post-installation best practices recommended for securing and managing a manually set up local server stack?
Community Poll
Next Lesson
Course Contents : WordPress Local Development Environments
- >> 3.
 Manually Building with WAMP, MAMP, and LAMP