Integrating Git into Your Local WordPress Workflow
- -->> 8. Integrating Git into Your Local WordPress Workflow
What you'll learn
 Git BasicsLocal Development SetupCollaboration with GitVersion Control Best Practices
Unlocking the Power of Git for WordPress
Tracking changes, collaborating with teams, and managing different versions of your project can be very complicated. Version control systems, most notably Git, provide a robust framework to achieve this. Integrating Git into your local WordPress development workflow is not just a best practice; it's a fundamental step towards efficient, reliable, and scalable project management. This article will guide you through the process of setting up Git for your local WordPress projects, exploring its core functionalities, and establishing best practices to streamline your development cycle.
Why Git is Essential for Local WordPress Development
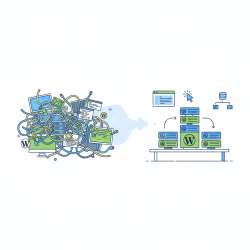
Developing a WordPress site, whether for a client or a personal project, involves numerous changes to themes, plugins, and custom code. Without a proper system, tracking these modifications can quickly become a nightmare. Git offers a solution by providing a comprehensive history of every change, enabling developers to:
- Track every file modification, knowing who made it and why.
- Collaborate seamlessly with other developers on the same codebase without overwriting each other's work.
- Experiment safely with new features or design changes on separate branches without affecting the stable version.
- Revert to any previous state of the project with ease, mitigating the risk of critical errors.
- Maintain a clear separation between development, staging, and production environments.
These capabilities significantly enhance productivity, reduce development time, and safeguard your project's integrity, making Git an indispensable tool for any serious WordPress developer.
Setting Up Git for Your WordPress Project
Getting started with Git for your local WordPress project involves a few straightforward steps. Assuming Git is already installed on your system, the first step is to initialize a Git repository within your WordPress root directory.
First, navigate to your WordPress root directory using your terminal or command prompt. This is typically where your `wp-config.php` file and `wp-content` folder reside. Once there, initialize Git by running:
git init
This command creates a hidden `.git` directory, which is where Git stores all the history and metadata for your project. Next, it's crucial to set up a `.gitignore` file. This file tells Git which files and directories to ignore, preventing unnecessary or sensitive items from being tracked. For a typical WordPress project, you'll want to ignore core WordPress files (as they are usually managed separately), database dumps, cache files, and developer-specific configurations. A common `.gitignore` for WordPress often includes:
- `wp-content/uploads/`
- `wp-content/cache/`
- `wp-config.php` (if it contains sensitive credentials)
- `.env` files
- `node_modules/` (if using front-end tooling)
- The entire WordPress core (excluding `wp-content` and root files you manage).
By carefully crafting your `.gitignore`, you ensure that your repository remains clean and focused solely on the custom code, themes, and plugins you are actively developing.
The Core Git Workflow: Commit Your Changes
Once Git is initialized and your `.gitignore` is in place, you can begin tracking your work. The basic Git workflow revolves around three primary commands: `git status`, `git add`, and `git commit`.
Use `git status` frequently to see the current state of your repository. It shows which files have been modified, which are staged for a commit, and which are untracked.
After making changes to your custom theme, plugin, or any other file you wish to track, you need to stage these changes. Staging tells Git that you want to include these specific modifications in your next commit. You can stage individual files or all changes with:
git add .
Finally, to save your staged changes to the repository's history, you commit them. A commit is a snapshot of your project at a specific point in time, always accompanied by a descriptive message explaining what changes were made and why:
git commit -m
Comprehension questions
 What are four key reasons why Git is essential for local WordPress development?Which Git command is used to initialize a new Git repository in your WordPress project directory?What is the purpose of a .gitignore file in a WordPress Git repository, and what are some common items to include in it?Explain the three core Git commands involved in the basic workflow for committing changes.
Review Quiz
Next Lesson

Course Contents : WordPress Local Development Environments
- >> 8.
 Integrating Git into Your Local WordPress Workflow