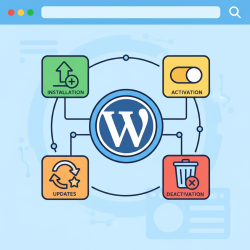
Plugins: Installation, Activation, Updates, and Deactivation
- -->> 6. Plugins: Installation, Activation, Updates, and Deactivation
What you'll learn
 Plugin Installation MethodsPlugin Activation and DeactivationImportance of Plugin UpdatesWordPress Site Maintenance Best Practices
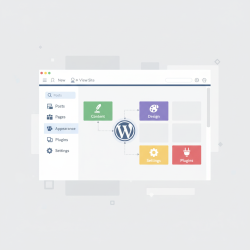
WordPress is an incredibly powerful and flexible platform, and much of its versatility comes from its extensive ecosystem of plugins. Plugins are essentially pieces of software containing a group of functions that can be added to a WordPress website to extend its functionality or add new features. From enhancing SEO and security to building online stores and contact forms, plugins empower users to customize their sites without needing to write a single line of code. However, managing these powerful tools effectively is crucial for maintaining a healthy, secure, and high-performing WordPress site. This guide will walk you through the essential aspects of plugin management: installing, activating, updating, and deactivating plugins, ensuring you can confidently harness their potential.
What Are WordPress Plugins?
At its core, WordPress provides a robust framework for building websites. While it offers a solid foundation, it's designed to be extensible. Plugins fill this role, allowing users to add specific features and functionalities that aren't built into the core software. Think of them as apps for your website. There are tens of thousands of free and premium plugins available, covering virtually every imaginable need. Choosing the right plugins and managing them properly is key to a successful WordPress experience.
Installing Plugins
There are several methods for installing plugins, catering to different scenarios and user preferences. Understanding each method will equip you to handle various plugin installations with ease.
Through the WordPress Dashboard (Search)
This is the most common and recommended method for installing free plugins directly from the WordPress plugin directory. It's straightforward and secure.
- Navigate to your WordPress dashboard.
- Go to Plugins > Add New.
- Use the search bar on the top right to find the plugin you're looking for (e.g., "Yoast SEO" or "WooCommerce").
- Once you find the desired plugin, click the Install Now button.
- WordPress will download and install the plugin automatically.
- After installation, you'll see an Activate button. Click it to make the plugin functional on your site.
This method is ideal for users looking for popular, well-vetted plugins available in the official repository.
Through the WordPress Dashboard (Upload)
This method is typically used for premium plugins purchased from third-party developers or for custom plugins that are not available in the WordPress directory. These plugins usually come as a downloadable .zip file.
- Purchase or obtain the plugin as a .zip file from its source. Do not unzip the file.
- Go to your WordPress dashboard.
- Navigate to Plugins > Add New.
- At the top of the "Add Plugins" page, click the Upload Plugin button.
- Click Choose File and select the .zip file of your plugin from your computer.
- Click Install Now.
- Once installed, click the Activate Plugin button to enable it.
Ensure the plugin's .zip file is correctly formatted; otherwise, the upload may fail.
Manual Installation (FTP)
This method is less common for beginners but can be useful in specific situations, such as when dashboard access is restricted or for troubleshooting. It requires an FTP client (like FileZilla) and your website's FTP credentials.
- Download the plugin's .zip file to your computer and unzip it. This will create a folder with the plugin's name.
- Connect to your website's server using an FTP client.
- Navigate to the
wp-content/plugins/directory in your WordPress installation. - Upload the unzipped plugin folder (the one containing the main plugin files, often with a
.phpfile named after the plugin) into thewp-content/plugins/directory. - Once uploaded, go to your WordPress dashboard, navigate to Plugins > Installed Plugins.
- You should see the newly uploaded plugin in the list. Click Activate to enable it.
This method gives you more direct control but also carries a higher risk if done incorrectly, so exercise caution.
Activating Plugins
After a plugin is installed, it needs to be activated to function. Activation essentially tells WordPress to load and execute the plugin's code. Without activation, an installed plugin simply sits dormant on your server. To activate, navigate to Plugins > Installed Plugins from your dashboard. Locate the desired plugin and click the Activate link beneath its name. Once activated, the plugin's features will become available, and you can usually find its settings in the WordPress dashboard menu, often under its own dedicated menu item or within an existing one like Settings or Tools.
Updating Plugins
Regularly updating your plugins is one of the most critical aspects of WordPress site maintenance. Neglecting updates can lead to security vulnerabilities, compatibility issues, and a poorly performing website.
Why Update?
- Security Patches: Developers frequently release updates to fix security flaws that hackers could exploit.
- Bug Fixes: Updates resolve existing errors and improve plugin stability.
- New Features and Improvements: Developers often add new functionalities, optimize performance, and enhance user experience.
- Compatibility: Updates ensure plugins work correctly with the latest versions of WordPress core and other plugins.
How to Update
WordPress makes updating plugins very convenient. When an update is available for an installed plugin, you'll typically see notifications in a few places:
- A numerical badge next to the "Plugins" menu item in the dashboard.
- A notice at the top of the Plugins > Installed Plugins page.
- An "update available" message beneath the specific plugin's name in the "Installed Plugins" list.
To update, simply click the Update Now link beneath the plugin name. WordPress will handle the download and installation of the new version automatically. Before performing major updates, especially for critical plugins, it's always a good practice to back up your website to prevent data loss in case of an unforeseen issue.
Deactivating and Deleting Plugins
Just as important as installing and updating, knowing how to deactivate and delete plugins is essential for managing your site's resources and troubleshooting.
Deactivation
Deactivating a plugin disables its functionality without removing its files or settings from your site. This is useful for troubleshooting conflicts, temporarily disabling a feature, or if you're not sure if you want to completely remove a plugin yet.
- Go to Plugins > Installed Plugins.
- Locate the plugin you wish to deactivate.
- Click the Deactivate link beneath its name.
The plugin will immediately stop running, and its features will no longer be active on your site. Its settings, however, usually remain stored in your database, making reactivation simple.
Deletion
Deletion permanently removes a plugin's files from your server. You can only delete a plugin once it has been deactivated.
- First, deactivate the plugin as described above.
- After deactivation, the "Deactivate" link will change to "Delete".
- Click the Delete link.
- WordPress will ask for confirmation. Confirm the deletion.
Deleting a plugin removes its core files. However, some plugins may leave behind residual data in your database. For a complete cleanup, you might need to use a database optimization plugin or manually clean the database, though this is often not necessary for average users.
Best Practices for Plugin Management
Effective plugin management goes beyond just knowing the steps. Implementing best practices ensures your WordPress site remains robust and efficient.
- Install Only Necessary Plugins: Each plugin adds code and potential overhead. Only install plugins that genuinely add value and are essential for your site's functionality.
- Research Before Installing: Always check a plugin's reviews, last update date, compatibility with your WordPress version, and active installations. For premium plugins, verify the developer's reputation and support.
- Keep Plugins Updated: As emphasized, updates are crucial for security and performance. Automate updates where possible, but always monitor for potential conflicts.
- Regular Backups: Before any major updates to core, themes, or plugins, perform a full site backup. This allows you to revert your site if something goes wrong.
- Delete Unused Plugins: Deactivated plugins still take up space and can pose a security risk. If you're not using a plugin, delete it.
- Test on a Staging Site: For critical sites, consider having a staging environment where you can test new plugins or updates before deploying them to your live site.
Summary
WordPress plugins are indispensable for extending the functionality of your website, but their proper management is paramount. This article has guided you through the fundamental processes of installing plugins via the dashboard search, dashboard upload, and manual FTP methods. We've also covered the critical steps of activating plugins to bring them to life, the importance of regular updates for security and performance, and how to effectively deactivate and delete plugins when they are no longer needed. By adhering to these practices and adopting smart plugin management strategies, you can ensure your WordPress site remains secure, efficient, and fully functional, continuously adapting to your evolving needs.
Comprehension questions
 What are the three primary methods for installing WordPress plugins, and when might you use each?Why is it crucial to regularly update WordPress plugins, and what are the main benefits of doing so?Explain the difference between deactivating and deleting a WordPress plugin. When would you choose one over the other?List at least three best practices for effective WordPress plugin management to ensure a secure and efficient website.
Review Quiz
Next Lesson
Course Contents : Navigating the WordPress Dashboard
- >> 6.
 Plugins: Installation, Activation, Updates, and Deactivation