Restoring a WordPress Site with Minimal Downtime
- -->> 9. Restoring a WordPress Site with Minimal Downtime
What you'll learn
 WordPress Site RestorationBackup Management Best PracticesDatabase and File RecoveryMinimizing Website Downtime
In the unpredictable world of web hosting, unforeseen events such as server failures, cyber-attacks, or accidental deletions can bring a WordPress site down in an instant. The ability to quickly and efficiently restore your website from a backup is not just a luxury; it's a fundamental necessity for business continuity and reputation management. This comprehensive guide will walk you through the entire process of restoring a WordPress site from a backup, with a strong emphasis on strategies and best practices designed to minimize downtime, ensuring your site is back online and fully functional as swiftly as possible.
The Importance of Preparedness and Backup Integrity
Before any restoration can begin, the foundation of a successful recovery lies in diligent preparation. Regular and reliable backups are your digital safety net. Without a recent, valid backup, the restoration process becomes significantly more complex, if not impossible.
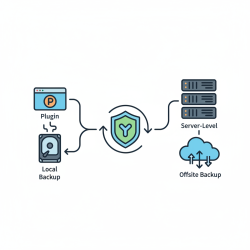
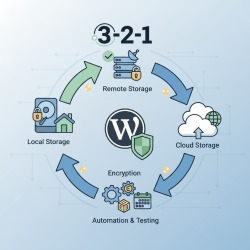
Ensure your backup strategy covers both your WordPress files (including themes, plugins, uploads, and core files) and your database. Many reputable hosting providers offer daily backups, but relying solely on them can be risky. Implementing a robust third-party backup solution or manually creating backups provides an additional layer of security. Always store backups in multiple, secure locations, such as cloud storage or an external hard drive, away from your web server.
Crucially, test your backups periodically. A backup that cannot be restored is useless. Regularly performing test restores on a staging environment confirms the integrity of your backup files and familiarizes you with the restoration process, saving valuable time during an actual emergency.
Pre-Restoration Checklist: Setting the Stage for Success
Before initiating any restoration, a methodical approach is vital. Having a clear plan and all necessary information at hand will streamline the process and reduce stress during a critical period.
- Identify the Problem: Understand why the restoration is needed. Was it a plugin conflict, a malware infection, a server crash, or a user error? This helps in choosing the correct backup point and preventing recurrence.
- Gather Credentials: Collect all essential login details: your hosting control panel (cPanel, Plesk, etc.), FTP/SFTP access, phpMyAdmin, and WordPress administrator credentials.
- Choose the Right Backup: Select the most recent backup point prior to the incident, ensuring you don't restore any corrupted data. If the issue was recent, an older backup might be preferable to avoid reintroducing the problem.
- Inform Stakeholders: If your site serves clients or customers, consider a brief communication about potential temporary downtime. Transparency can manage expectations.
- Enable Maintenance Mode (if accessible): If your site is partially accessible but broken, activate WordPress maintenance mode using a plugin or by manually creating a
.maintenancefile to prevent visitors from seeing a broken site and to prevent new data from being written during restoration.
Restoring Your WordPress Files
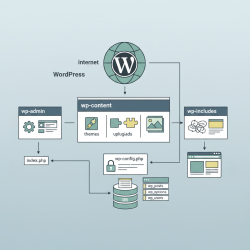
The files make up the structural and visual components of your WordPress site. There are several methods to restore them, depending on your backup source and technical comfort.
If you're using a backup plugin (e.g., UpdraftPlus, Duplicator, BackupBuddy), many offer an intuitive restoration interface directly from your WordPress dashboard or through a standalone script. This is often the fastest method. Follow the plugin's specific instructions for file restoration.
For manual restoration, access your server via cPanel's File Manager or an FTP/SFTP client like FileZilla. Navigate to your WordPress root directory (usually public_html or www). You'll typically need to:
- Delete the existing WordPress files, *excluding* your
wp-config.phpfile and yourwp-content/uploadsfolder if you want to retain recent uploads not part of the backup. If the backup is very recent and complete, you might opt to overwrite everything. - Upload the backed-up WordPress files (excluding the database file) to your root directory. Ensure all folders and subfolders are correctly placed.
This process can take time depending on the size of your site and your internet connection speed. Monitor the transfer carefully to ensure all files are uploaded successfully.
Restoring Your WordPress Database
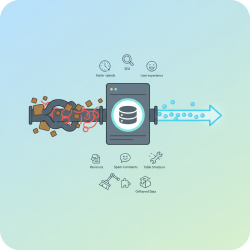
The database stores all your posts, pages, comments, user information, plugin settings, and more. Restoring it accurately is critical for your site's content to reappear correctly.
Again, if using a backup plugin, its restoration wizard will guide you through importing the database backup. This is generally the preferred method due to its simplicity.
For manual database restoration, you'll typically use phpMyAdmin, accessible through your hosting control panel:
- Log into phpMyAdmin and select the database associated with your WordPress site.
- Go to the "Operations" tab and locate the "Remove Database" section. It's often safer to "Drop all tables with prefix" rather than deleting the entire database, especially if other applications share it. Confirm the deletion of existing tables.
- Navigate to the "Import" tab. Click "Choose File" and select your
.sqlbackup file. - Ensure the format is SQL and click "Go" to begin the import.
Once the database is imported, verify your wp-config.php file. Ensure the database name, username, password, and host are correct and match your current hosting environment. If you've restored a database from a different domain or server, you might need to update the site URL within the database itself (e.g., using a search and replace tool or manually via phpMyAdmin's wp_options table).
Post-Restoration Steps and Verification
After both files and the database are restored, the work isn't quite done. Several crucial steps remain to ensure full functionality and minimal recurrence of issues.
- Clear Caches: Purge all caching layers – WordPress caching plugins (e.g., WP Super Cache, LiteSpeed Cache), server-side caching, and CDN caching (e.g., Cloudflare). Stale cache can display old or broken content.
- Check Permalinks: Go to your WordPress admin dashboard, navigate to Settings > Permalinks, and simply click "Save Changes" without making any alterations. This often refreshes the rewrite rules, preventing 404 errors.
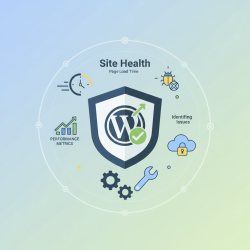
- Thorough Site Testing: Browse your site extensively. Check multiple pages, posts, images, forms, user logins, and critical plugin functionalities (e.g., e-commerce checkout, contact forms). Verify that all content is present and links are working correctly.
- Scan for Malware (if applicable): If the restoration was due to a security breach, perform a thorough security scan using a plugin like Sucuri or Wordfence to ensure no malicious code remains.
- Remove Maintenance Mode: Once you're confident the site is fully operational, disable maintenance mode.
Minimizing Downtime: Proactive and Reactive Strategies
While restoration aims to get you back online, strategic approaches can significantly reduce the period your site is unavailable.
Staging Environments: Always test restorations and major updates on a staging site. This allows you to verify functionality and iron out any issues without affecting your live site. Once confirmed, you can push the validated backup to production or manually apply the fixes.
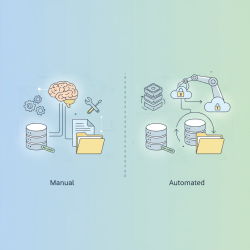
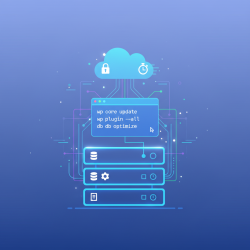
Automated Backup Solutions: Invest in premium backup plugins or hosting plans that offer automated, incremental backups and one-click restoration. These tools drastically cut down manual effort and recovery time.
Professional Support: If you're uncomfortable with manual restoration, don't hesitate to leverage your hosting provider's support team. Many offer restoration services as part of their plans, which can be invaluable during a crisis.
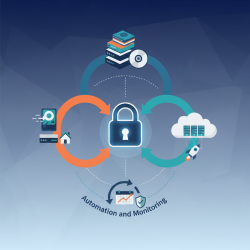
Regular Monitoring: Employ uptime monitoring services that alert you immediately if your site goes down. This allows for a swift response, potentially catching issues before they impact a wide audience.
Summary
Restoring a WordPress site from a backup is a critical skill for any website owner. This guide has outlined a methodical process, starting with the foundational importance of reliable, tested backups. We covered essential pre-restoration preparations, detailing both manual and plugin-assisted methods for restoring WordPress files and databases. Crucial post-restoration verification steps were emphasized, alongside proactive strategies like staging environments and automated backups, all aimed at ensuring minimal downtime and a swift return to full functionality. By following these steps, you can confidently navigate the challenges of website recovery and maintain the integrity and availability of your WordPress presence.
Comprehension questions
 Why is testing backups periodically considered a crucial step in preparing for a WordPress site restoration?What are the key steps involved in manually restoring WordPress files using cPanel File Manager or an FTP/SFTP client?Describe the process of manually restoring a WordPress database using phpMyAdmin, including a safety consideration.Beyond clearing caches, what are two other critical post-restoration steps to ensure full WordPress site functionality?
Community Poll
Next Lesson

Course Contents : Mastering WordPress Site Maintenance
- >> 9.
 Restoring a WordPress Site with Minimal Downtime